
Look what I made!
So I took the plunge and made Theo a Tipi for his birthday. My friend originally shared this pattern with me, which looked simple and great. We decided to go to Ikea to have a look at fabric, as it's close and fairly cheap for interesting designs. We chose some nice fabric and bought it. Only later did I realise I'd made a bit of a rooky error, and had bought fabric with a vertical design, where the pattern needs a design that is horizontal as it wraps around the frame. Doh!
So after a bit of fretting I decided that instead of buying new fabric I would just have to make my own pattern up. After looking over the other tipis I posted I figured out a fairly simple way of doing it. But it would be fair to say I made most of it up as I went along, changed and added bits and prayed it wouldn't all end up a horrible mess.
(I attempted to take photos as I went along, but at one point I got to bit to engrossed in my work and forgot to take pictures of my progress, sorry)
So with a baby free house, some good music (First Aid Kit and The Tallest Man on Earth) to keep me going, I set to work!
First of all I laid out my fabric, which was 3m long x1.5m wide. Which is what the original pattern I was going to follow needed.
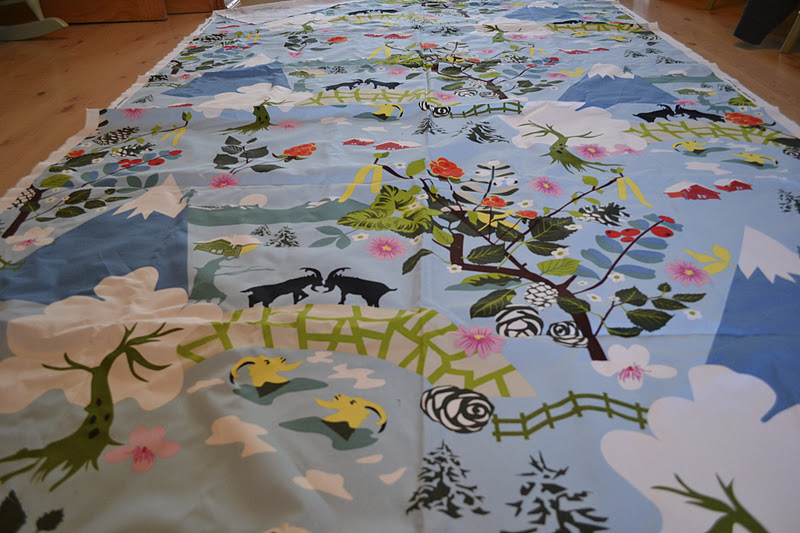
Originally I was going to try and get six panals out of the whole sheet, by splitting it in half and then into three, but after a bit of measuring I decided that it would be too short (a metre high) so I went with four panels of 150cms long x 75 cm wide. (my fabric was slightly under 150cm wide with the edges taken off but I just halved it anyway)
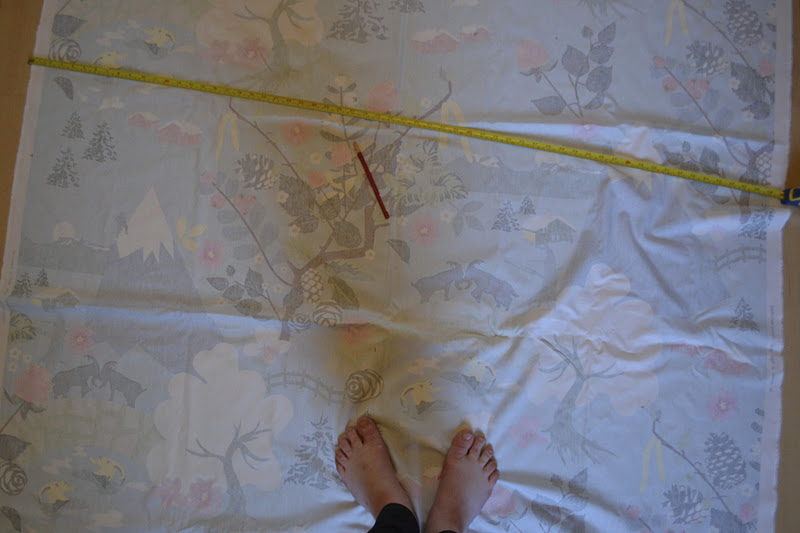
I measured and cut my fabric into four equal rectangles. I then on some separate white fabric of the same dimensions, measured out my triangle (I did this first as a test, but then used it as a template for real fabric). I measured the mid point at the top of the rectangle and marked it. I then measured 4 centimeters to each side of the mid point and marked those. I then drew two diagonal lines from the bottom corners to meet at the top points. I left a 8cm gap at the top, which would be easier to work on.

When I had my four panels (now triangles) cut out I had a play with the structure. I had 6 bamboo poles about 2m long. I realised that I would need 5 panels of fabric to make the tipi shape (otherwise it would be a square tent!) and to use 5 poles.
This is where I would have run into a bit of trouble and would have needed to either go out and get more of the same fabric, or use a different fabric for the extra panel. This is where I had to improvise majorly! Luckily I had enough of the plain white fabric I used as a test in my fabric stash, so decided I would use that for the extra panel.
So I measured and cut out a new triangle out of the white sheet. I lay this on top of one of my original panels to check the size, and realised that it looked better with the white fabric as a liner. (This is something I didn't consider before I started, but am glad I added in.) So I ended up cutting four new triangles to use as a liner, as well as the extra one for the spare panel.
I pinned the liner and the fabric together then lay them all out next to each other.

I then pinned all the edges together, with the two seams meeting on the inside to create a neat seam on the outside. Next I had to figure out how I would secure the poles to the fabric. Originally I was going to have the poles on the outside of the fabric, with sleeves sewn on the outside to hold them in place, but I decided that this was unnecessary extra work, as I could slide the poles between the fabric and the liner, and then sew a pocket to hold the poles at the seams.


I used one pole per triangle, and put it on the right edge of each one. As you can see in the picture I attached the extra plain white panel to the edge, which would become the door. The panel that joined this one when a full circle (the far right one) then needed two poles to make the structure secure.

I slid the poles inbetween the fabrics and used pins to mark how wide the pocket needed to be. I wanted the pocket to be fairly snug, to stop them slipping and to make the structure tighter.

With everything pinned I was ready to start sewing it together! All the measuring, cutting and pinning took me about 5 hours, so I called it a day after that. My knees and back were killing me by this point! (Theo better appreciate all the effort that went into this hah!)
The next afternoon I started up work again ( I might mention that none of this would have been possible had it not been for Rob being on holiday and taking Theo out for the afternoons)
I also made up lots of the sewing part as I went along, as I realised easier and better ways of doing it. If I were to make another one it would probably take me half the time, and would be neater, but this was my first attempt!

I started with the door panel side first, attaching that to the main fabric. I folded the join in half and sewed along the inside edge. The seam join was also on the right, next to the pole pocket. After sewing the length of the triangle I hemmed the bottom and the top, making sure I left a gap at the top above the pole pocket. On the first two panels I sewed the seam in one line, then two lines to create the pocket. After the first two I then figured out that I could just use the edge of the seam as one side of the pocket, saving me some time! (does that make sense?)
So instead of having three separate stitched lines I only had two. The joining seam and one edge of the pocket.
This I repeated until I reached the last panel where I had to sew a pole pocket on each side. I then attached the door to this last panel, so I had a complete inside out circle. I turned the fabric the right way and voila- I had my Tipi!
With a bit of help from Rob we threaded the poles into their pockets and stood it up. Oh I might just add that the pockets were sealed at the bottom, so the poles don't stick out the end onto the floor. At the top of the tipi to keep the fabric from sliding down the poles and making the structure less stable (the fabric needs to be taut to hold the poles in place) I used some yarn wrapped tightly around the top of the fabric and the poles, and for now it seems to be doing the job. I am thinking that I could use a staple gun to secure the fabric to the poles as well, but I'll have to see how well it holds on it's own for the next few days! Once the fabric was held in place and the structure taut, I cut a slit up the white panel to create the flaps for the door. I need to figure out a way to hem these so it doesn't fray, perhaps some bias binding hand sewn on. But for now here you are!

I know it's supposed to be for his birthday, but we've left it up and had a bit of a play in it already. Mainly peekaboo through the door (me inside) and hide and seek from daddy (us both inside!) and its fair to say Theo loves it!


So there you have it, my slightly bodged job which actually turned out ok! If anyone wants to try their own version feel free to use my (made up) design, but please credit me if publishing it online (thanks!) Alternatively, if anyone wants to commission me to make their child a tipi I would love to give it a go, just email me!
So after a bit of fretting I decided that instead of buying new fabric I would just have to make my own pattern up. After looking over the other tipis I posted I figured out a fairly simple way of doing it. But it would be fair to say I made most of it up as I went along, changed and added bits and prayed it wouldn't all end up a horrible mess.
(I attempted to take photos as I went along, but at one point I got to bit to engrossed in my work and forgot to take pictures of my progress, sorry)
So with a baby free house, some good music (First Aid Kit and The Tallest Man on Earth) to keep me going, I set to work!
First of all I laid out my fabric, which was 3m long x1.5m wide. Which is what the original pattern I was going to follow needed.
Originally I was going to try and get six panals out of the whole sheet, by splitting it in half and then into three, but after a bit of measuring I decided that it would be too short (a metre high) so I went with four panels of 150cms long x 75 cm wide. (my fabric was slightly under 150cm wide with the edges taken off but I just halved it anyway)
I measured and cut my fabric into four equal rectangles. I then on some separate white fabric of the same dimensions, measured out my triangle (I did this first as a test, but then used it as a template for real fabric). I measured the mid point at the top of the rectangle and marked it. I then measured 4 centimeters to each side of the mid point and marked those. I then drew two diagonal lines from the bottom corners to meet at the top points. I left a 8cm gap at the top, which would be easier to work on.
When I had my four panels (now triangles) cut out I had a play with the structure. I had 6 bamboo poles about 2m long. I realised that I would need 5 panels of fabric to make the tipi shape (otherwise it would be a square tent!) and to use 5 poles.
This is where I would have run into a bit of trouble and would have needed to either go out and get more of the same fabric, or use a different fabric for the extra panel. This is where I had to improvise majorly! Luckily I had enough of the plain white fabric I used as a test in my fabric stash, so decided I would use that for the extra panel.
So I measured and cut out a new triangle out of the white sheet. I lay this on top of one of my original panels to check the size, and realised that it looked better with the white fabric as a liner. (This is something I didn't consider before I started, but am glad I added in.) So I ended up cutting four new triangles to use as a liner, as well as the extra one for the spare panel.
I pinned the liner and the fabric together then lay them all out next to each other.
I then pinned all the edges together, with the two seams meeting on the inside to create a neat seam on the outside. Next I had to figure out how I would secure the poles to the fabric. Originally I was going to have the poles on the outside of the fabric, with sleeves sewn on the outside to hold them in place, but I decided that this was unnecessary extra work, as I could slide the poles between the fabric and the liner, and then sew a pocket to hold the poles at the seams.
I used one pole per triangle, and put it on the right edge of each one. As you can see in the picture I attached the extra plain white panel to the edge, which would become the door. The panel that joined this one when a full circle (the far right one) then needed two poles to make the structure secure.
I slid the poles inbetween the fabrics and used pins to mark how wide the pocket needed to be. I wanted the pocket to be fairly snug, to stop them slipping and to make the structure tighter.
With everything pinned I was ready to start sewing it together! All the measuring, cutting and pinning took me about 5 hours, so I called it a day after that. My knees and back were killing me by this point! (Theo better appreciate all the effort that went into this hah!)
The next afternoon I started up work again ( I might mention that none of this would have been possible had it not been for Rob being on holiday and taking Theo out for the afternoons)
I also made up lots of the sewing part as I went along, as I realised easier and better ways of doing it. If I were to make another one it would probably take me half the time, and would be neater, but this was my first attempt!
I started with the door panel side first, attaching that to the main fabric. I folded the join in half and sewed along the inside edge. The seam join was also on the right, next to the pole pocket. After sewing the length of the triangle I hemmed the bottom and the top, making sure I left a gap at the top above the pole pocket. On the first two panels I sewed the seam in one line, then two lines to create the pocket. After the first two I then figured out that I could just use the edge of the seam as one side of the pocket, saving me some time! (does that make sense?)
 | ||
| Far right stitch is the seam, next stitch is the edge of the pocket that I ended up not sewing with the rest of the panels. and forgive my messy work |
This I repeated until I reached the last panel where I had to sew a pole pocket on each side. I then attached the door to this last panel, so I had a complete inside out circle. I turned the fabric the right way and voila- I had my Tipi!
With a bit of help from Rob we threaded the poles into their pockets and stood it up. Oh I might just add that the pockets were sealed at the bottom, so the poles don't stick out the end onto the floor. At the top of the tipi to keep the fabric from sliding down the poles and making the structure less stable (the fabric needs to be taut to hold the poles in place) I used some yarn wrapped tightly around the top of the fabric and the poles, and for now it seems to be doing the job. I am thinking that I could use a staple gun to secure the fabric to the poles as well, but I'll have to see how well it holds on it's own for the next few days! Once the fabric was held in place and the structure taut, I cut a slit up the white panel to create the flaps for the door. I need to figure out a way to hem these so it doesn't fray, perhaps some bias binding hand sewn on. But for now here you are!
 |
| Alma get acquainted. Please excuse the MASSIVE mess in the background, a result of trying to keep Theo entertained! |
 | ||
| The happy bebe! |
So there you have it, my slightly bodged job which actually turned out ok! If anyone wants to try their own version feel free to use my (made up) design, but please credit me if publishing it online (thanks!) Alternatively, if anyone wants to commission me to make their child a tipi I would love to give it a go, just email me!

omigawd...that is awesome!! You can make me one! you clever sausage! x
ReplyDeleteLOVE LOVE LOVE it. The fabric is beautiful - I like how it doesn't match up perfectly it works well. You are extremely clever to have made that. It made my head hurts just reading the instructions! My sewing skills are zip!
ReplyDeleteGlad theo is enjoying it :)
I wish I had one of THESE when I was little. I can't wait to make a tipi when I have kids...!
ReplyDeleteAnd it'll be great in the summer months in the garden as a nice little shady spot to play in. I love the IKEA fabric too, Theo is a lucky boy! :)
Can I have an adult sized one please?
ReplyDelete